Hey, I'm back, sorry it's been so long since my last project but I have one here for you and would love to hear if you had a go and see the pictures of what you made :)
Fabric Bauble
What you need
Polystyrene ball approx 2.5 to 3 inches in diametre
cushion wadding
fabric scraps
cottons
needle and thread
pva glue
ribbon
buttons
beads and embellishments
1. Work out how many you want to make then cut out a circle of fabric approximately 7-8 inches in diametre for each ball.
2. Take a polystyrene ball and brush lightly with pva glue and then wrap with a thin layer ( 1cm thick ) of wadding hold until it is starting to dry and continue with the rest.
3. Then using a needle and thread run a loose stitch around the edge of a fabric circle and place a ball in the centre, pull the needle and scrunch the fabric up around the ball and stitch the top making sure the ends are neatly tucked inside.
4. Then using all your scraps and embellishments, sew them all over the ball and add a loop of ribbon to the top so you can hang the item up.
5. you can add beads and buttons and many other things to decorate.
Tip: try not to overload the bauble, remember it needs to hang so it needs to be fairly light, also for a seasonal touch you can add little bells that will jingle when moved !
Monday 25 October 2010
Saturday 3 July 2010
Juliet's ATC tin !
This isn't really a how to make because they are ATC's which most of you are aware of how to make anyway but I thought I would post a few pics of the ATC tin I made and a couple of ATC's because I bought this lovely set of papers new out this month from Docrafts and got really excited that I have been devising projects to use them in... if you go over to my other blog Little Miss Crafty I will post in the next couple of weeks a couple of fun projects that you can purchase the 'how to make' from my Etsy site, so basically It will be a password to a blog where there are pictures and video of how to make a project, with info and tips (if I have any :) and also you get a free package of goodies to use in the project......
Saturday 8 May 2010
'How to makes'....Published !!!!
Hi, yes it's been a long time, sorry ! But I have been working on 'makes' and i will be putting them up here as soon as possible, in the mean time I thought I would share with you the makes that I have had published...two magazines, cloth paper scissors and making gifts ! They came across my other blog and asked to put my items in their articles... and I think they look wicked, I am going to start actually contacting magazines with my stuff so maybe i will get more coverage and I am already working on other projects for 'making gifts' magazine for the next issue...exciting ! both magazines have links to their websites if you click on the pictures of them on the right !
Sunday 20 December 2009
Christmas mini scrapbook
Yep, it's bee a while but as it's Christmas and I have a minute right now, I thought I would write a quick post on this mini scrapbook I have made with some gorgeous papers from My Mind's Eye !
Okay, you need the usual stuff like papers and card stock, scissors, scalpel/craft knife, ribbons, glue, foam pads, embellishments, thick cardboard and you will also need a 'zutter' as shown in the pick but hey you all know what I am talking about :)
1. I made this mini book with pre-cut card stock from DCWV the smallest 9.5 cm size blocks which I just picked out the colours to match the patterned papers from My Mind's Eye and punched the binding holes with the zutter and also used a corner cutter to make the round corners.
2. For the cover use a card stock square as a template on the really thick cardboard and cut out using the craft knife...BE CAREFUL ! also cut out the rounded edges too with the knife.
3. Using your papers etc.. decorate the cover on both sides of each but before you start adding 3d embellishments etc.. punch the binding holes on each side with the zutter...
now you can decorate properly with all your bits and bobs and even add a ribbon closure with punches or brads...
4. Get all your pages in the order you want them and then thread onto the binding wire..these come in long lengths so using a pair of wire cutters, cut to size for the number of holes you have on the book first !...
5. With all the pages on, push the wire together and add more ribbon to the binding for decoration as well as tags etc :)
6. You are ready to now make more as gifts or add pictures and journaling to this one !
Saturday 5 September 2009
Jacob's Ladder
A little video to show you how it works :) ignore the noise, I had the tv on and forgot it would record... I may do more videos of how to makes with narration and put them on Youtube ! Good idea ?
Project number 2...Jacob's Ladder !
You will need, thick card or mount board about 2mm thick, patterned papers, 3 lengths of 1 metre long fairly thin ribbon i.e not grosgrain (this tends to be a bit too thick), pva glue, paint embellishments photographs or pictures etc and general craft tools i.e scalpel and mat etc
1. Using a sharp craft knife or scalpel and a metal ruler accurately cut 10 or 12 6cm by 6cm squares from the thick card or board. Put these pieces in pairs making sure each pair are the same size. If necessary re-cut some to make sure they are the same.
2. On one side of each square draw three lines, one along the centre and one on either side of the square parallel about 1 cm in from the edge...to make sure they are all the same line up the sqaures together and draw the lines in one go rather than measure and draw each square seperately.
3. Paint or cover the plain side of the squares leaving the drawn lines on the other side.
4. Take one square and place it covered side down, glue the first piece of ribbon along the centre right to the edge keeping it straight, then glue the other two pieces in the opposite direction on each side along the lines.
5. Take the other square from the pair and glue that down on top making sure all the edges are glued and that the ribbon has been pulled fairly taught but not too tight or too loose, sounds hard but it's not :) just firm ! If it is too loose or too tight it won't flip flop properly
6. Making sure you hold it down long enough to be secure flip the ribbons over the top keeping them straight and flat and taught put another square pattern side down on top of the ribbon and then repeat steps 5 and 6 until you get to the final piece.
sorry the ribbons should still be stretched over the blue spotted square in the pic below when you put the next square on top
7. Once you get to the last square, cut the outer ribbon pieces off before the edge to keep it neat, then cut the middle piece about 3 inches long off the edge and fold it back over before gluing the last piece on so that you can use it as a hanging tab !
Tip, just make sure as you go along that the edges of the ribbon are matching up so it flows properly..
8. Attach pictures, words and flat embellishments UNDERNEATH the ribbon and on the squares, DO NOT GLUE THINGS TO THE RIBBON OR ON TOP OF THE RIBBON as this will stop the ladder working !
9. Have fun and I bet you want to make more than one ...I did and you can vary the sizes and number of squares but not too much as all these changes and stop it working well.
Also lease leave a comment and let me know what you think :)
Wednesday 2 September 2009
One of three projects...
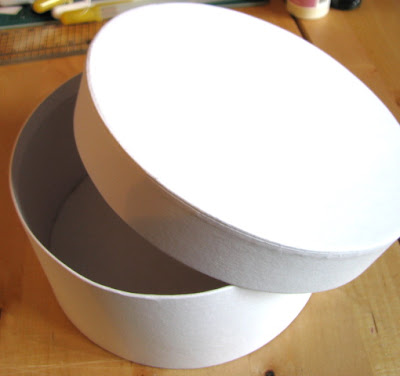
This is not really a 'how to' because it is really easy and you have probably done it all before but maybe it is more of a reminder of what you can do with a bit of paint, some craft paper and a few embellishments..decorate a plain box, cigar box, chipboard box etc you can send them to someone special or use to decorate your home and they are even practical to keep things in from domestic to nuts and bolts, hair bobbles and clips or other craft materials etc etc the possibilities are endless !
The next two projects will go up this week and the second will be 'how to' make a Jacobs ladder' now these are really fun !
Also don't forget to go over to my blog www.littlemisscrafty.blogspot.com to put your name down to win one of my new heart brooches...'wandering Princess'
Subscribe to:
Posts (Atom)