Sunday, 20 December 2009

Christmas mini scrapbook


Yep, it's bee a while but as it's Christmas and I have a minute right now, I thought I would write a quick post on this mini scrapbook I have made with some gorgeous papers from My Mind's Eye !

Okay, you need the usual stuff like papers and card stock, scissors, scalpel/craft knife, ribbons, glue, foam pads, embellishments, thick cardboard and you will also need a 'zutter' as shown in the pick but hey you all know what I am talking about :)

1. I made this mini book with pre-cut card stock from DCWV the smallest 9.5 cm size blocks which I just picked out the colours to match the patterned papers from My Mind's Eye and punched the binding holes with the zutter and also used a corner cutter to make the round corners.

2. For the cover use a card stock square as a template on the really thick cardboard and cut out using the craft knife...BE CAREFUL ! also cut out the rounded edges too with the knife.

3. Using your papers etc.. decorate the cover on both sides of each but before you start adding 3d embellishments etc.. punch the binding holes on each side with the zutter...
now you can decorate properly with all your bits and bobs and even add a ribbon closure with punches or brads...

4. Get all your pages in the order you want them and then thread onto the binding wire..these come in long lengths so using a pair of wire cutters, cut to size for the number of holes you have on the book first !...

5. With all the pages on, push the wire together and add more ribbon to the binding for decoration as well as tags etc :)

6. You are ready to now make more as gifts or add pictures and journaling to this one !

Saturday, 5 September 2009

Jacob's Ladder


A little video to show you how it works :) ignore the noise, I had the tv on and forgot it would record... I may do more videos of how to makes with narration and put them on Youtube ! Good idea ?

Project number 2...Jacob's Ladder !


You will need, thick card or mount board about 2mm thick, patterned papers, 3 lengths of 1 metre long fairly thin ribbon i.e not grosgrain (this tends to be a bit too thick), pva glue, paint embellishments photographs or pictures etc and general craft tools i.e scalpel and mat etc


1. Using a sharp craft knife or scalpel and a metal ruler accurately cut 10 or 12 6cm by 6cm squares from the thick card or board. Put these pieces in pairs making sure each pair are the same size. If necessary re-cut some to make sure they are the same.

2. On one side of each square draw three lines, one along the centre and one on either side of the square parallel about 1 cm in from the edge...to make sure they are all the same line up the sqaures together and draw the lines in one go rather than measure and draw each square seperately.

3. Paint or cover the plain side of the squares leaving the drawn lines on the other side.


4. Take one square and place it covered side down, glue the first piece of ribbon along the centre right to the edge keeping it straight, then glue the other two pieces in the opposite direction on each side along the lines.


5. Take the other square from the pair and glue that down on top making sure all the edges are glued and that the ribbon has been pulled fairly taught but not too tight or too loose, sounds hard but it's not :) just firm ! If it is too loose or too tight it won't flip flop properly


6. Making sure you hold it down long enough to be secure flip the ribbons over the top keeping them straight and flat and taught put another square pattern side down on top of the ribbon and then repeat steps 5 and 6 until you get to the final piece.


sorry the ribbons should still be stretched over the blue spotted square in the pic below when you put the next square on top


7. Once you get to the last square, cut the outer ribbon pieces off before the edge to keep it neat, then cut the middle piece about 3 inches long off the edge and fold it back over before gluing the last piece on so that you can use it as a hanging tab !


Tip, just make sure as you go along that the edges of the ribbon are matching up so it flows properly..


8. Attach pictures, words and flat embellishments UNDERNEATH the ribbon and on the squares, DO NOT GLUE THINGS TO THE RIBBON OR ON TOP OF THE RIBBON as this will stop the ladder working !


9. Have fun and I bet you want to make more than one ...I did and you can vary the sizes and number of squares but not too much as all these changes and stop it working well.


Also lease leave a comment and let me know what you think :)

Wednesday, 2 September 2009

One of three projects...


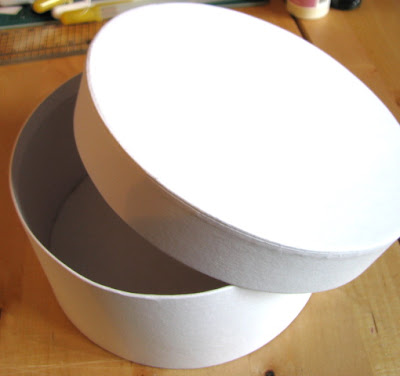
This is not really a 'how to' because it is really easy and you have probably done it all before but maybe it is more of a reminder of what you can do with a bit of paint, some craft paper and a few embellishments..decorate a plain box, cigar box, chipboard box etc you can send them to someone special or use to decorate your home and they are even practical to keep things in from domestic to nuts and bolts, hair bobbles and clips or other craft materials etc etc the possibilities are endless !


The next two projects will go up this week and the second will be 'how to' make a Jacobs ladder' now these are really fun !


Also don't forget to go over to my blog www.littlemisscrafty.blogspot.com to put your name down to win one of my new heart brooches...'wandering Princess'

Tuesday, 1 September 2009

Project problems...

I am still having problems uploading my pictures for this project, they are too big and take ages to attempt to upload before telling me they can't ! grrrrr but i am going to borrow a different camera and definitely upload them this week...I finish work early tomorrow so this is what I will be spending tomorrow afternoon doing ! please come back and check !

Sunday, 12 April 2009

Inchie pendant/clip !

Hey there, new project today is an Inchie pendant/ clip meaning it can be either or both....
Okay what you need is shown in the first photo it is basically general craft stuff as always, paper, tools and embellishments, you won't need a lot as it's very little !


1. From a sheet of 12 x 12 scrapbook paper cut two 1 inch high strips, mark each inch with a tiny dash and then fold concertina style and glue the two strips together to make one long strip.


2. Cover two 1 inch cardboard/chipboard squares and decorate.

3. On the inside of one of the squares glue down a piece of ribbon approx 6 inches long in the centre ( this will tie the book together)

4. Glue each end of the strip to the insides of the covers and tie the ribbon around the front to keep bound.

5. You can decorate the inside pages however you like with miniature photos etc....GO WILD ! and make loads.


6. Now you can glue a wooden peg to the back so that you can peg this on to books note boards etc etc or you can make a hole in the top of the back cover, add a jump ring and then a piece of cord, ribbon or a chain and wear as a pendant on a necklace or make loads and have on a bracelet !

Saturday, 4 April 2009

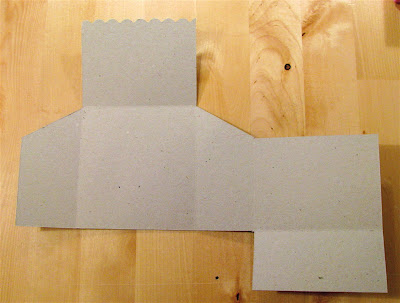
ATC house template


Sorry it's been so long but my scanner just won't play ball so I have photographed my template please excuse the spilt tea stains !
Most of the measurements are in inches but where the size was quite small I have used centimetres, make sure that the scored sides when folded are on the outside, use brown gummed parcel tape and leave to dry before painting or covering or if you are super confident and have a really strong glue you can glue them edge to edge and hold till dry !
If you can't quite make out the sizes double click on the photo and it will go to it's original size on another window !
I have also forgotten to add the measurement of the triangle, from the 3 inch wall height it is a further 3 cms then the line for the fold of the roof...

Sugar edge decorations


From my blog I have put a short 'how to' make here for the coloured ruff hanging decorations.

You will need:
cardstock or decorative papers
selection of paper punches
decorative edged scissors
glue
string
embellishments
glitter
needle and thread
coloured crepe paper/ streamers

1. Firstly Cut a length of crepe paper roughly 2 inches wide and 1 metre long and cut one of the long sides with the decorative edge scissors.

2. Using the needle and thread use a loose tacking stitch on the straight edge the push all the paper to the anchored stitch ( the first stitch) and pull into a circle and stitch both edges together.

3. Dab some glue along the outside edge of the ruff and then shake over glitter, leave all to dry.

4. While they are drying punch out circles from the papers and cardstock and embellish how you like just make sure to make 2 for each ruff so one goes on each side.
Also cut lengths of string and knot into a loop to hang decorations by.

5. When dry glue both embellished circle pieces one to each side but don't forget to lay a knotted loop to one side of the decoration before gluing a side on.

Hang up and make as many as you like :)


Don't forget you can change all the colours and materials and make some really lovely ones for any occasion or just to decorate your room or even for easter ....


Sunday, 29 March 2009

Colourful paper bunting/banner !


Hey there sorry I haven't updated for a while but I have had computer and software problems not to mention the internet but anyway, I am showing you here how I made this colourful Princess banner great for a room decoration or a party decoration, if you do have a go I would love you to leave a comment for me to have a look at it or I could even add it to the blog here as well as a link to your blog !

What you need to make a 10 flag banner !

1 piece of 12 x 12 scrapbook paper
selection of colourful crepe paper/ streamers
chipboard letters or any large ones you like
flat back crystals x10
assorted coloured fibers and wool or ribbon
coloured cardstock
needle and thread

eyelets and tool

General tools,
cutting mat
craft knife
ruler
pencil
hot glue gun ( not a necessity I love it because it dries quickly)
scalloped scissors
white and black pens
Decorative medium circle punch with or without scalloped edge


You have 10 flags to make the word princess and a spare at each end for crown chipboards etc but obviously you can put whatever you want on or as many flags as you like, just remember to put the flags in the right order to get the correct spelling :)

1. Take the 12 x 12 paper and draw a line across the middle (on the back !)
then mark across the top and bottom 4 inch intervals so you get 3 sections, then find the middle of each section and mark it on the line you first drew in the middle then draw lines to make up all 10 flags ( see my photo to see what I mean)


2.add any extra 2d decoration to the paper flags such as drawing stamping or writing for the background, I have drawn a border in white pen.


3. Punch out 10 circles in coloured cardstock and decorate with chipboard letters, pens etc

4. Cut crepe paper into strips of about 1 metre long and 2 inches wide using scalloped edge scissors, then using a loose tacking stitch sew the straight edge making sure to anchor the cotton to the corner with a few stitches and then push the paper to the end of the cottonand sew corners together to form a rosette and the cut off thread and glue loose edges together. make 10.


5. Glue the decorated punched circles to the middle of the rosette and the glue that to the flag.


6. punch holes and attach eyelets to each corner of the flags, then tie together with the coloured fibers, wool, ribbon etc and add crystals to the ends !!!!!!!!!!!!


Then have a party with all your princessy friends !


Thursday, 19 February 2009

ATC House


Hello, so here it is my first post how to make an ATC house ... now be patient with me, I am posting how to make pics and instructions but I can't post the template yet as I haven't figured out how to so I may have to add it tomorrow :)

What you need.

1. Scissors
2. Craft mat and knife
3. Thin to medium plain cardboard (chipboard may be too thick)
4. Gummed brown paper tape (art shops have this for use in holding watercolour paper to boards)
5. Selection of paints, papers embellishments and anything else you want.6. Other various tools i.e, paint brushes etc..

Step 1.
Using the soon to be added template, draw around using a fine pen or pencil marking off the lines that you need to match up to draw a folding point as the template will cover this.
Accurately cut out the house using a craft knife for a better finish as card does not bend well under the pressure of scissors. Lightly score the fold lines between each side with a knife.

Step 2.
Fold the house up and using the gummed tape lightly wash with a wet paintbrush or your finger and stick all the open edges together and leave to dray making sure the house looks straight, you may need to bend it before you leave to dry into the right position.


Tip..Do NOT get the tape too wet as it will not stick properly and will soak the cardboard ending in a sad looking soggy mess... :(

Step 3.
Paint house or cover, whatever you want to do and leave to dry.

Step 4.
Add embellishments, more paper, drawing, and even a base to add to stability and chipboard pieces.
Please note you can try to paint and embellish the house before you assemble it but it may be too difficult to fold up when paper etc has been glued on and paint may crack !

Step 5.
Have a go and let us know how you got on and I would love to post your finished pictures on here showing everyone's great work....

Yes this is a different house to the one I showed originally but it is the same template and I had already made that house before I had the idea for this blog and I didn't want to make two the same !